
Do you know How to Remove Graphics Card from Motherboard? Graphics cards are very important components inside a computer. Its function is to allow the processing of graphic elements to be displayed on the screen and thus improve the performance of the computer. Over the years, its technology has improved, which is why you want to replace your computer’s graphics card with a new one.
With the development of computer and software technology, they need more and more graphic resources. Because of this, graphics cards are constantly evolving. Even today it is possible to upgrade your Intel or Nvidia video graphics card without programs.
This technological advancement increases the ability to process graphic data, thus some graphics cards become obsolete over time.
To achieve the desired graphics performance, it is necessary to buy or replace the old graphics card with a newer and better card.
Things to consider before replacing a graphics card
Keep reading about what it is, what it is, usage, features, and types of graphics or video cards.
There are a few things to keep in mind before buying a new graphics card. The computer’s motherboard has a slot for inserting graphics cards. There are different types of slots that are not compatible with each other. Because if you buy a graphics card that is not for this space on the computer, it will not do any good.
It is also important to look at the power consumption and if it needs an alternative power connection. Because if the computer’s power source does not provide enough power, the graphics card will not work and it will be necessary to change the power source to make it more powerful.
Lastly, there are size, large graphics cards that can be a problem if you have a small tower or if it collides with other components such as RAM memories. Once you’ve studied all of these aspects and found the right one, you can replace your computer’s graphics card with a new one.

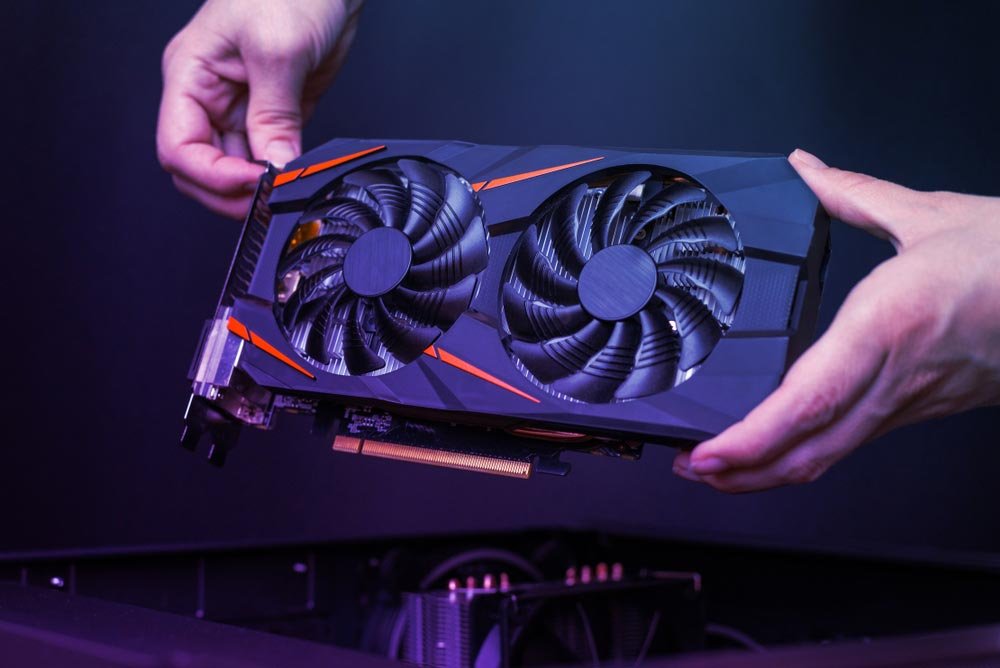
Physical Installation: How to Remove Graphics Card
After uninstalling the old card drivers, you should proceed to turn off the computer and disconnect it for maximum protection. It is also recommended to disconnect if the source has an on / off button.
It is then necessary to open the side cover of the tower to allow manipulation of the components. This should be done with a screwdriver and each removed screw should be well secured. Once the cover is removed, the tower must be touched to remove the static and thus no component is damaged. It is also advisable to keep your shoes on throughout the process.
After removing the static, you can proceed to remove the patches that secure the graphics card from the back to the tower. After performing this procedure, the card must be carefully removed, placed in a safe place, and the other card inserted.
You need to be careful if they have alternative connections or cables. Once installed, we proceed to turn on all the patches, then the cover and the computer. The last thing you need to do to replace your computer’s graphics card with a new one is to insert the driver CD to install or search for them on the Internet.
Steps to replace your computer’s graphics card with a new one.
The first step in replacing a graphics card is to install drivers for the old card that will be removed from the computer. This will avoid problems in the computer due to the installation of new component drivers when switching your computer’s graphics card to the new one, as it is easier to know the date and time of turning the PC on and off.
To do this you must enter the computer configuration and enter the “Programs” section then continue to select “Uninstall programs”.
All programs installed on the computer will be displayed in this window. Most cards have a client installed and installed. Also, it is possible to know which video card is on your computer.
You will need to proceed with the installation of the graphics card brand and thus remove the custom driver for this card.
Problems with Nvidia Optimus.
How do you know that technology Nvidia Optimos automatically manages Nvidia and Intel graphics cards? This sounds great because its main mission is to connect a high-performance graphics card with an integrated Intel processor for simple or desktop tasks.
The problem is that this technology, depending on the driver version, doesn’t always work properly, preventing us from using our dedicated graphics card in on-demand applications or games. If this is the case, just follow this guide to fix the problem.
How to disable laptop built-in graphics and use dedicated.
If you are reading this, the reason is that you have a very simple question, you want your laptop to always use dedicated graphics instead of an integrated processor. It may sound like an Odyssey, but trust me, it’s easy.
Today, most gaming laptops, or even the cheapest, both come with an integrated card (IGPU) that is part of the processor and a dedicated (GPU). The most popular tandem is Intel + Nvidia but there are several combinations, including Intel + AMD.
There is a problem when executing applications, in many cases, we always want to work with dedicated cards, so disabling connect can be a thrilling option though you should know:
Integrated graphics are less powerful, but more energy-efficient, resulting in longer battery life.
Dedicated graphics are great for high performance and gaming, but it uses a lot of power.
So, if you want to know how to disable the integrated graphics of your laptop and use dedicated stay, in this guide we will clarify all your doubts.
How to disable Intel integrated graphics and use dedicated Nvidia.
If we want to force our team to make the operating system always work with an integrated graphics card, we must take the following steps to get it right.
- We enter the Nvidia graphic controller panel: it is in the taskbar next to the battery indicator, wifi, etc., we double click on it
- We enter the Global Configuration section.
- We select the 3D configuration option then press the Control 3D configuration option.
- In the Preferred Graphics Processor option, we select the Control 3D configuration option.
- Now just change your favorite graphics processor box to the High-Performance Nvidia Processor option.
- Now just accept the changes to apply correctly.
With this we have found that our laptop only uses a dedicated graphics card, thus eliminating the use of integrated cards. Remember that enabling this option will increase battery consumption as well as performance.
How to Disable Intel Integrated Graphics and Use Dedicated AMD
In case your laptop includes an AMD dedicated graphics card, the process is very similar, so if you are operating with an AMD Radeon configuration, we will leave you with just how to use AMD dedicated graphics. Use
- On the desktop, we right-click and select AMD Radeon Settings.
- We will be in the Radeon Settings window, from there we click on Preferences at the bottom left, immediately click on Additional Radeon Preferences or Radeon Additional Settings
- We select the Energy tab and, in the drop-down menu, we select the Exchange graphics application settings.
- All we have to do now is choose which applications we want to enable the dedicated AMD graphics card in.
As we have seen, this is easy, although the problem is that in the case of AMD we will not be able to choose the global setting, although we will waste a few minutes in setting it up. We leave you an explanatory video so you don’t have trouble configuring or if it’s not clear to you:
Conclusion
I hope this article on How to remove Graphics card will help you to do steps carefully next time. let me know in the comments below if I miss out on anything.
